This section guides you through building a searchable list
Example:
Let’s say you're displaying Groups & Channels in a list.
You want users to filter between them using a search bar and UI controls like segmented buttons, filter chips, or suggestion chips.
You can configure one element to represent Groups and another for Channels, then apply the Filter clause to control what gets displayed.
Next, we’ll walk through how to set up a query builder condition for each element—so you can test and confirm that each input updates the search results as expected.
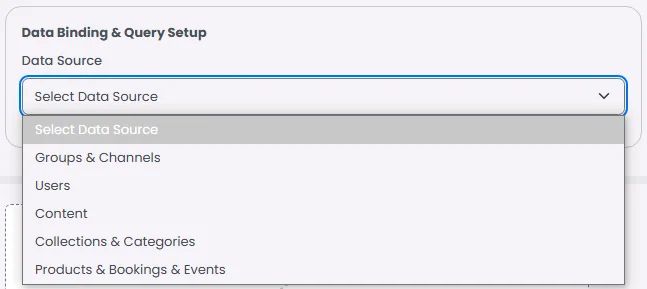
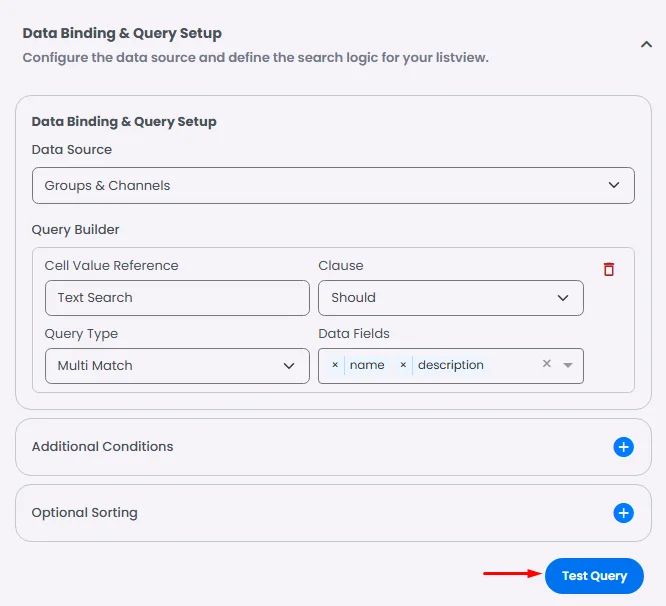
🗂️ Data Source
You need to determine what this list will show when a user searches for a certain item. You There are three types of data presented here:
- Groups & Channels
- Users
- Content
- Collections & Categories
- Products & Bookings & Events
Next, proceed with the query-building process by dragging and dropping your search elements.
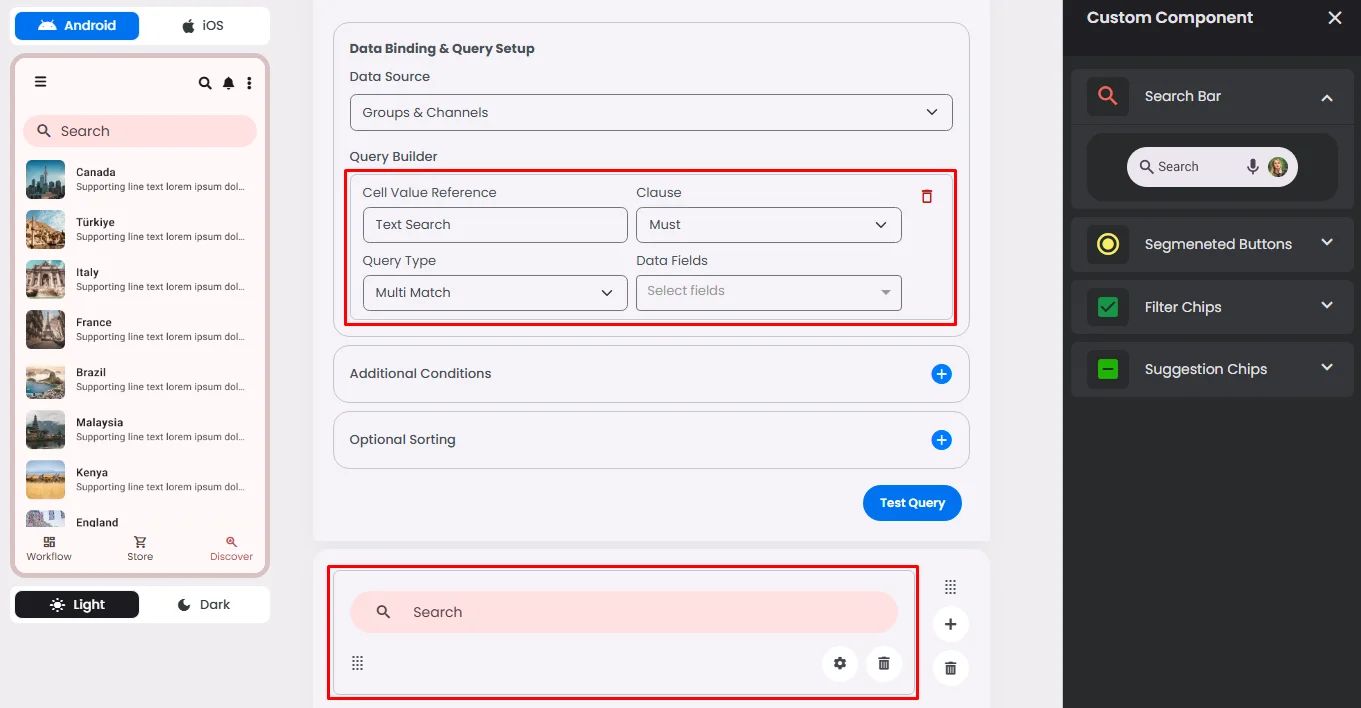
Using the example as a guide, let's consider dragging and dropping the Search Bar.
Note that each element you drop will show a new section in your query setup area, which is called ‘Query Builder.’
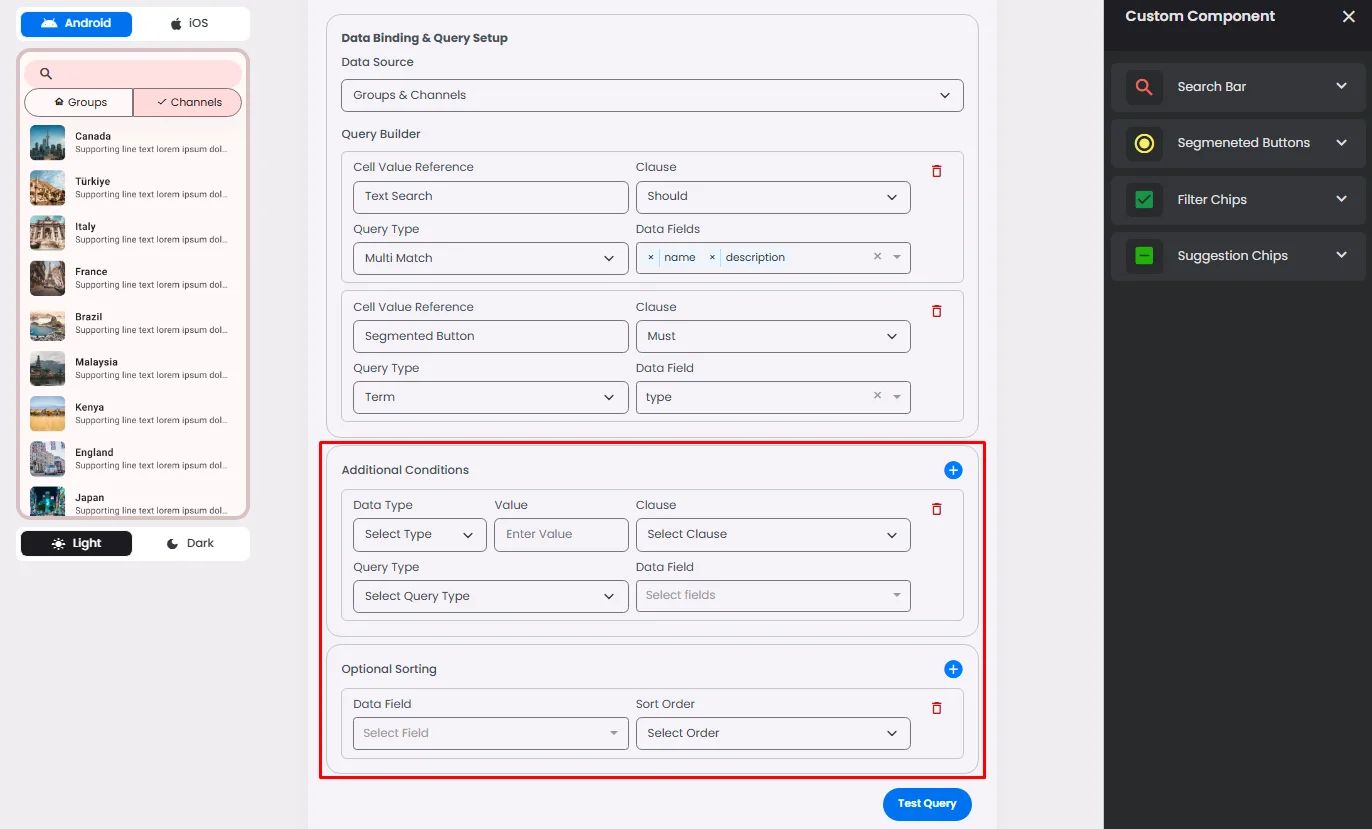
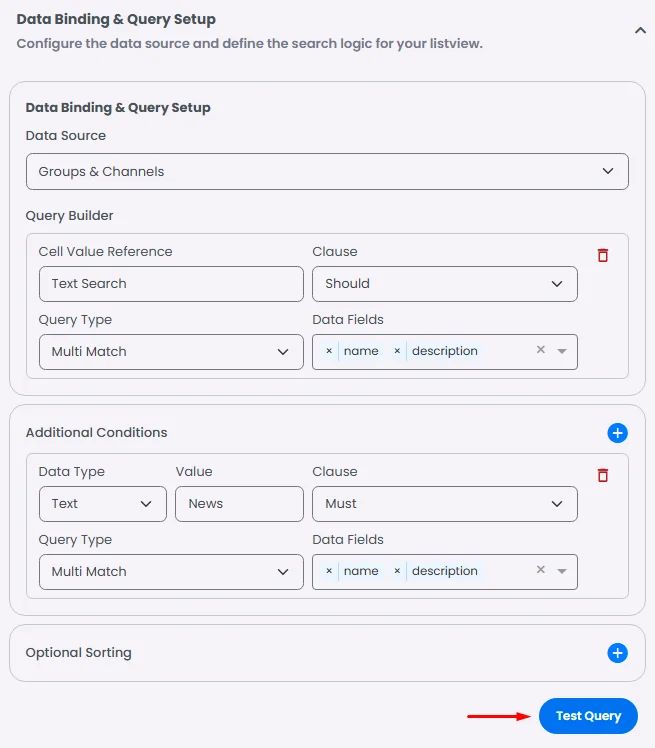
🛠️ Query Builder
You need to configure four sections in this document.
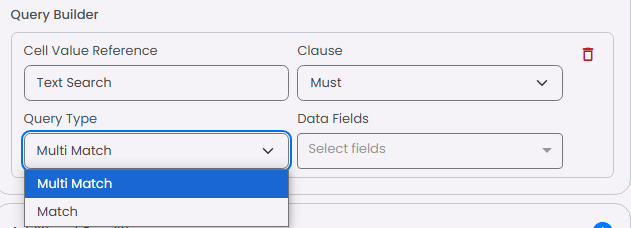
Cell Value Reference
This indicates the type of element that you dropped.
Based on our example, since we dropped a Search Bar element, the cell value reference will be Text Search.
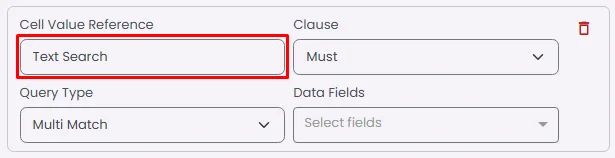
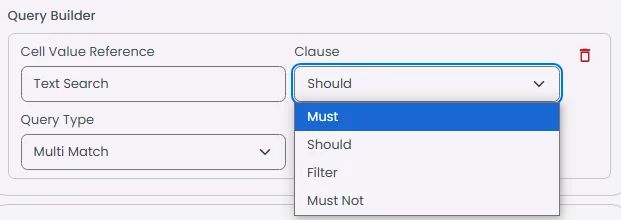
Clause
You have four options:
- Must: You want only documents that definitely match a certain condition.
- Should: You want to rank documents higher if they match, but you don’t want to exclude those that don’t.
- Filter: You want to apply exact constraints (e.g., tags, categories, date ranges) that don’t influence ranking.
- Must Not: You want to exclude documents matching a condition.
Based on the example, we will choose Should.
Query Type
- Match (to match one data field)
- Multi Match (to match multiple data field)
Based on the example, use Multi Match when the search text matches both the name and description fields of a group or channel. Use Match if only one of those fields (the name or the description) needs to be matched by the text.
Data Fields
Choose where you can find the condition you entered: Name, Description.
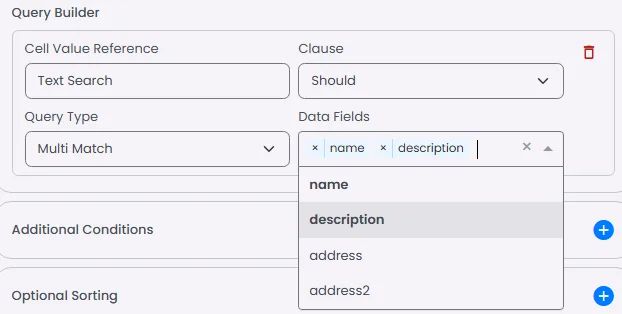
Note that if you choose your Data Source to be ‘Products & Bookings & Events,’ you will have an extra data field, ‘address,’ which represents the address of a certain booking or event.
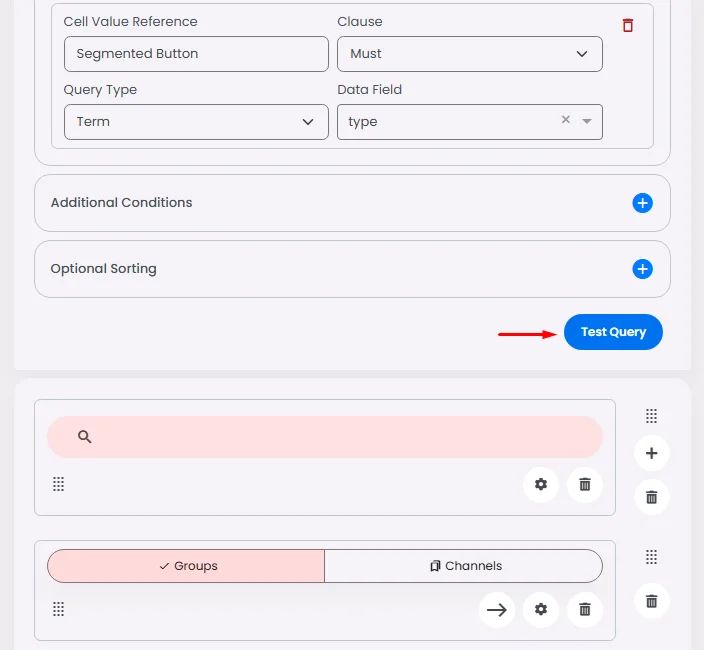
Click ‘Test Query.’
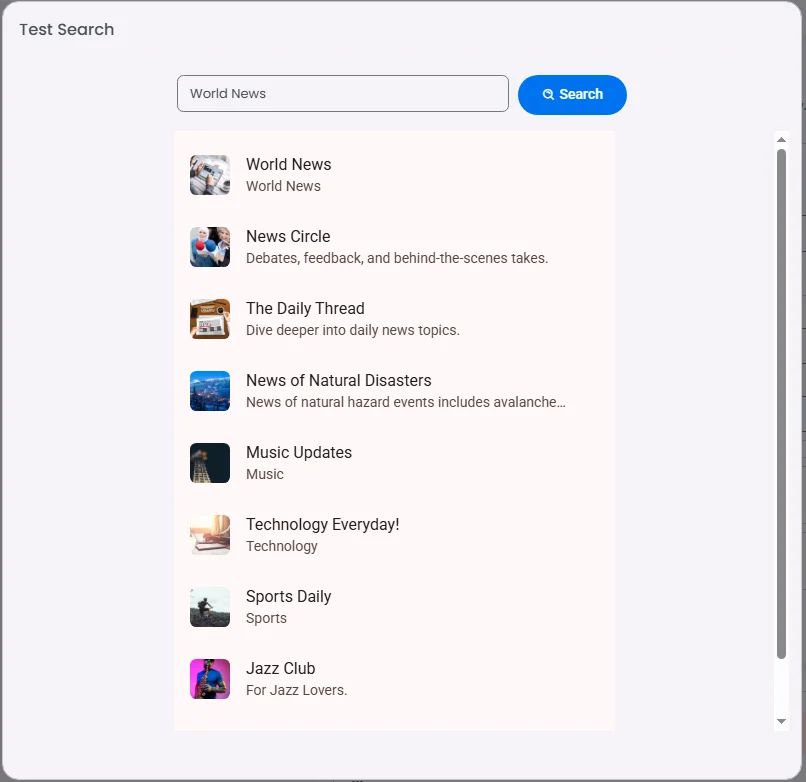
Add a value of a name of one of your channels or groups and click ‘Search’ to see your results.
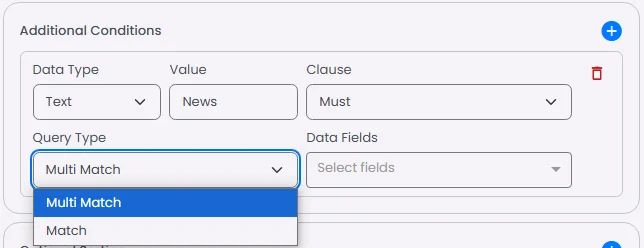
➕ Additional Conditions
The Additional Conditions section lets you define extra filtering rules that apply to the Search ListView results, regardless of any user input or search query. Use ‘Additional Conditions’ when you want the list of your search results to always respect certain constraints — for example, only show items from a specific category, type, or tag.
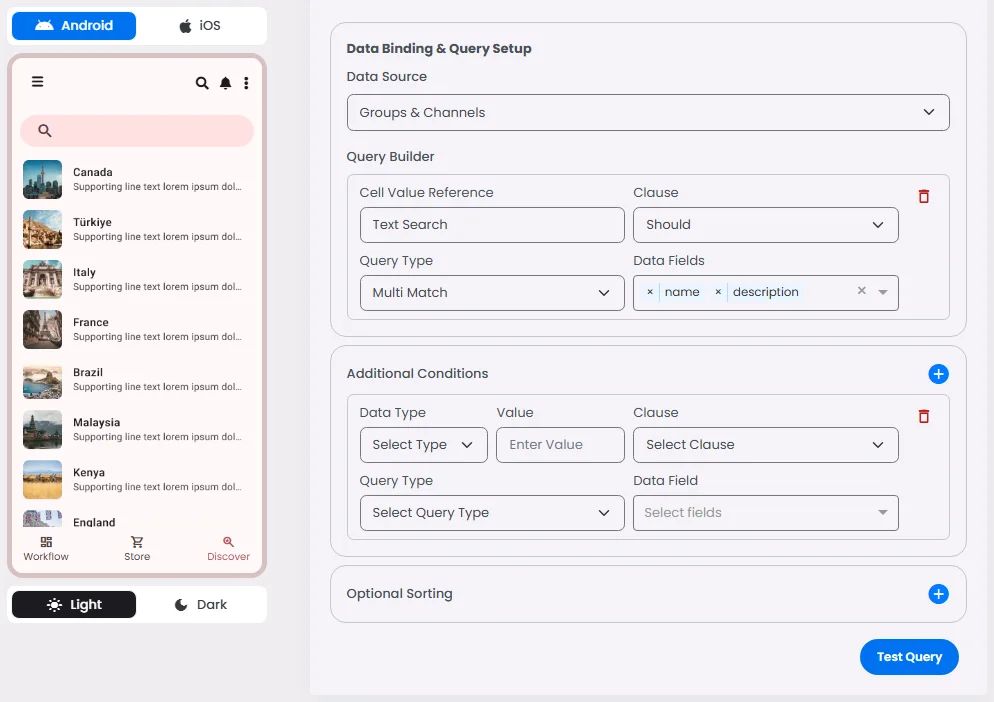
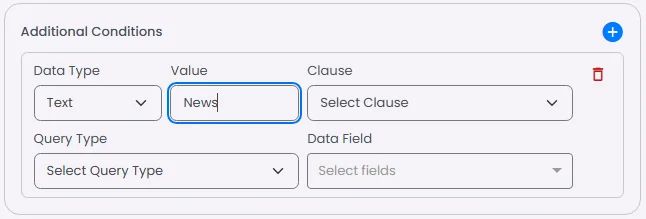
Data Type
Choose the type of data being written: Text, Number, or Keyword.
Keyword data type is related to the search keywords you added to the channels and groups.


Value
This section is for testing how the search list will look.
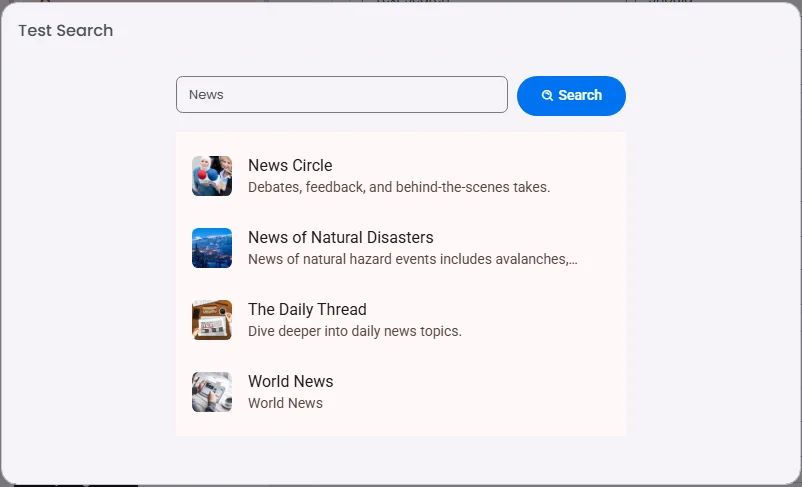
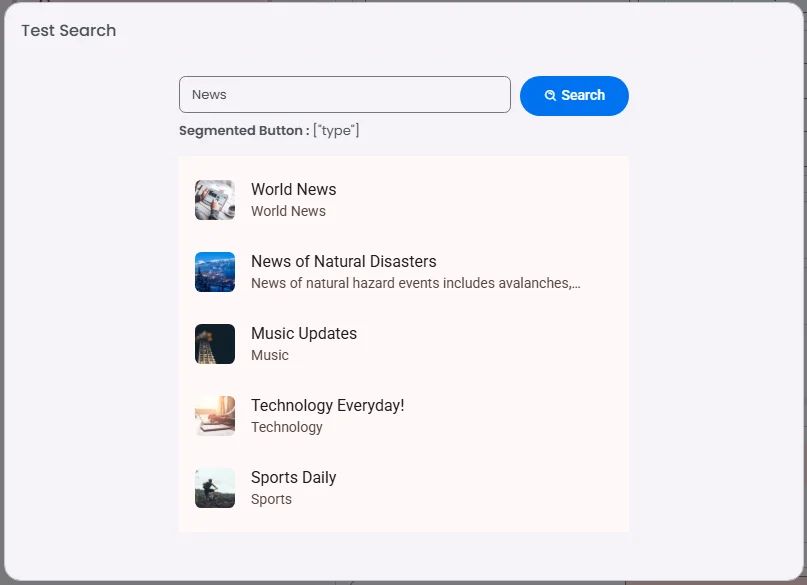
Based on the example, if you have channels and groups that include the word 'News' in their names or descriptions, add the text 'News' to the value.
Clause
You have four options:
- Must: You want only documents that definitely match a certain condition.
- Should: You want to rank documents higher if they match, but you don’t want to exclude those that don’t.
- Filter: You want to apply exact constraints (e.g., tags, categories, date ranges) that don’t influence ranking.
- Must Not: You want to exclude documents matching a condition.
Based on the example, if you want the list to display only News channels and groups, you should set the clause type to MUST, ensuring the condition is strictly applied.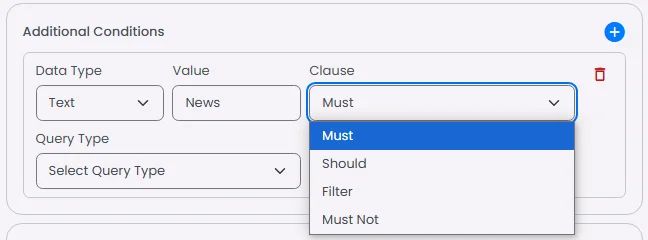
Query Type
- Match (to match one data field)
- Multi Match (to match multiple data field)
Based on the example, if the word ‘News’ appears in both the name and description fields of your channels and groups, use the Multi Match option. If it appears in only one of those fields (either name or description), use Match instead.
Data Field
Choose where you can find the condition you entered: Name, Description.
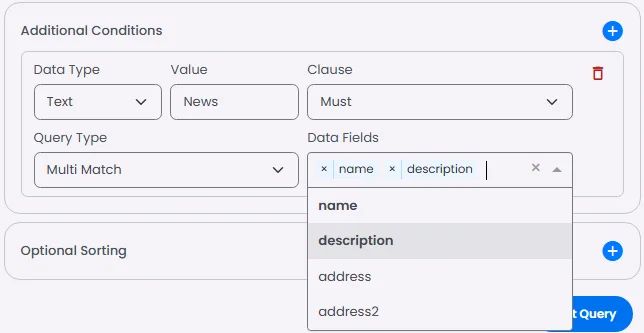
Note that if you choose your Data Source to be ‘Products & Bookings & Events,’ you will have an extra data field, ‘address,’ which represents the address of a certain booking or event.
Click ‘Test Query.’
Type your value ‘News’ and click ‘Search’ to see your results.

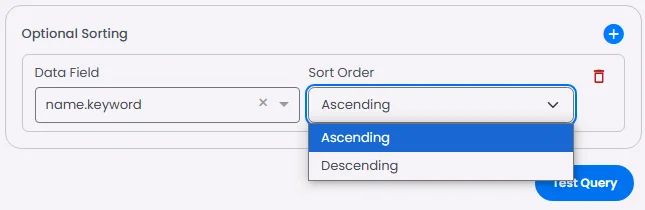
🔃 Optional Sorting
This section is entirely optional for you. This section controls the sorting of the search results that will appear for users:
Data Field
Choose the type of data field.
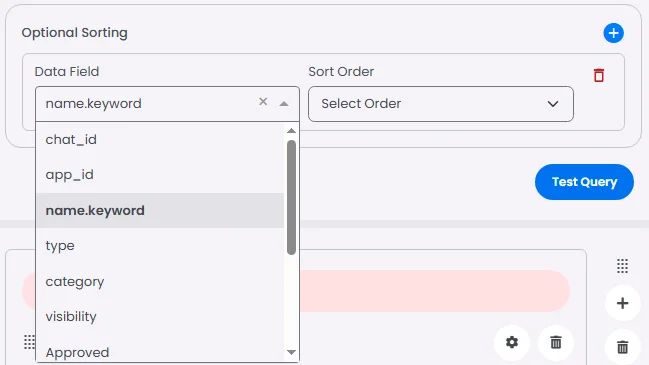
Sort Order
It is the order of the data field: Ascending & Descending.
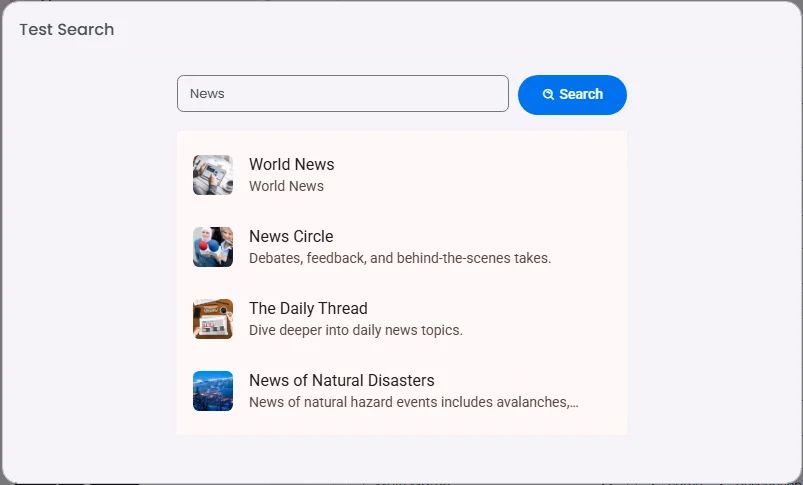
After doing all of this, click ‘Test Query’ and then ‘Search’ to see your results.
As shown in the example, you'll notice that the search results differ from the previous view — this time, the News Channels are displayed in ascending order.
🎛️ Filter Elements in Search (Chips & Buttons)
To enhance your search experience, you can attach extra elements such as segmented buttons, filter chips, or suggestion chips to your list. These components act as input triggers that help users filter search results more intuitively.
📌 In addition to the previous example, if your list contains both Groups and Channels, you can use a segmented button to let users toggle between them. One option can represent Groups, and the other can represent channels—each mapped to a query builder condition with a filter clause.
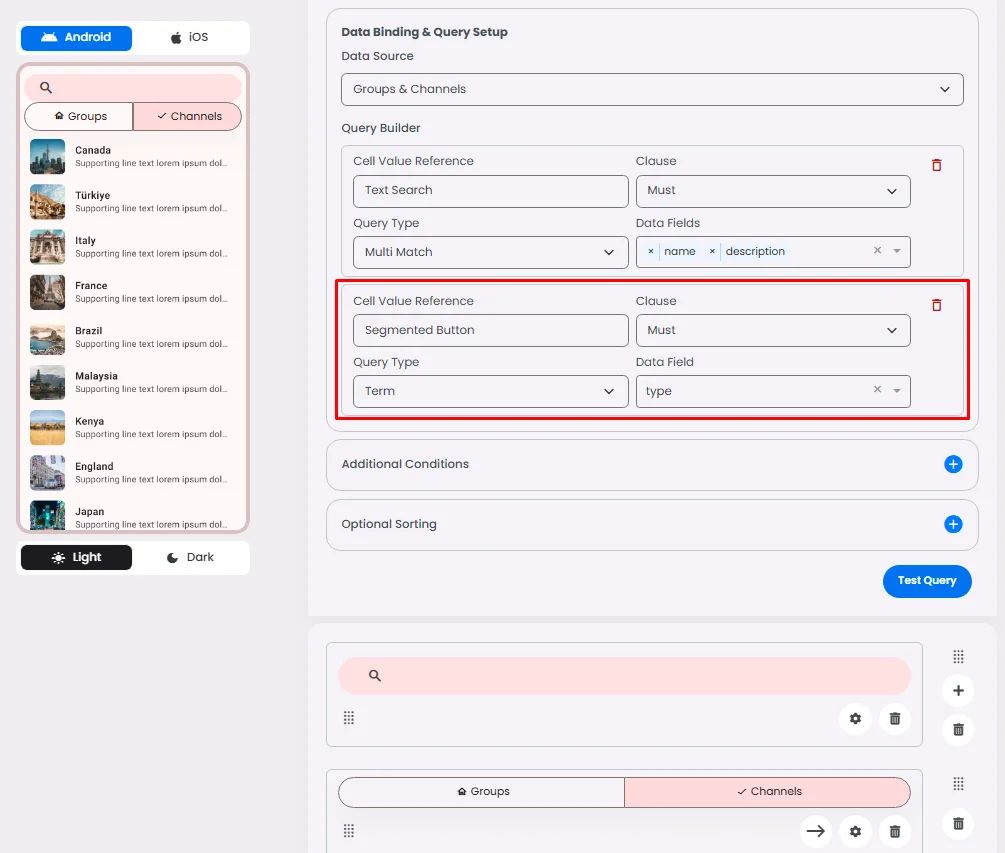
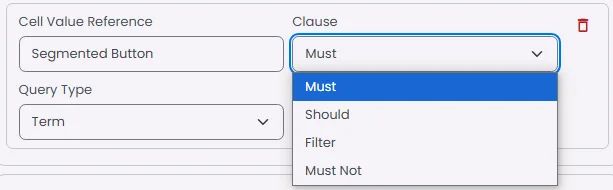
Clause
Based on the example, we will choose Must.
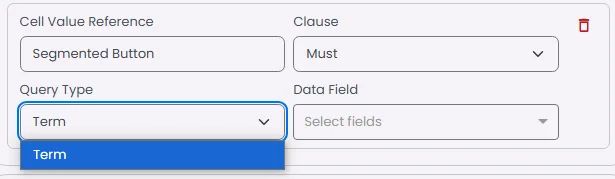
Query Type
The default is Term.
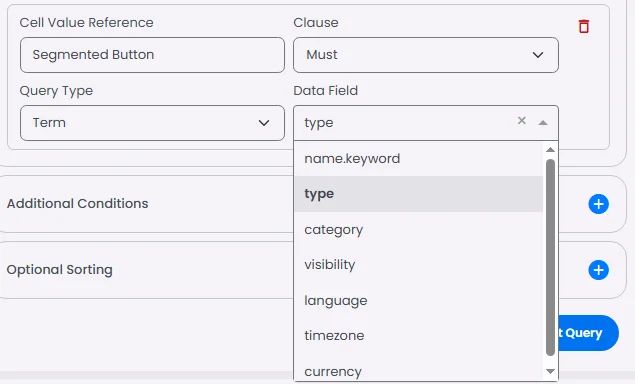
Data Field
Each data field has a certain value to use, even for testing:
Based on the example, we will choose the type.
Adding Value & Test
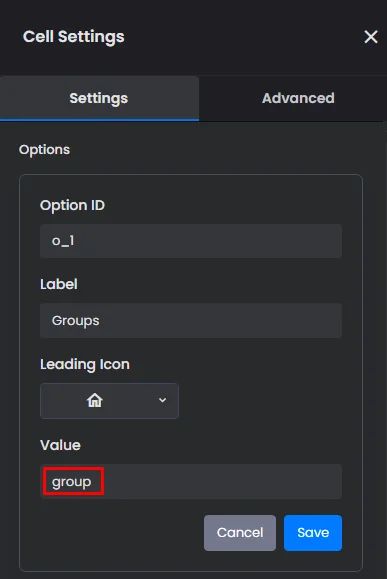
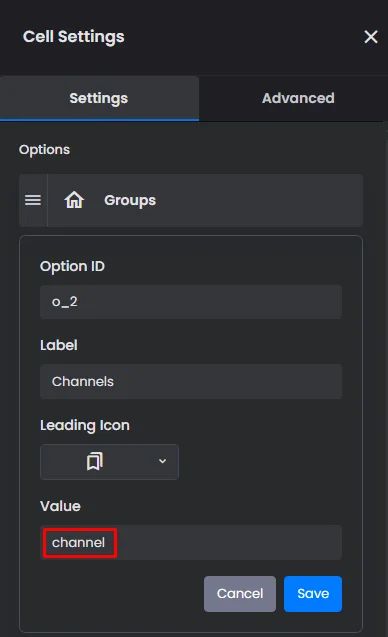
Click the gear icon of the segmented button.

Go to your options, add the value ‘group’ to your Groups option, and add the value ‘channel’ to the Channels option.
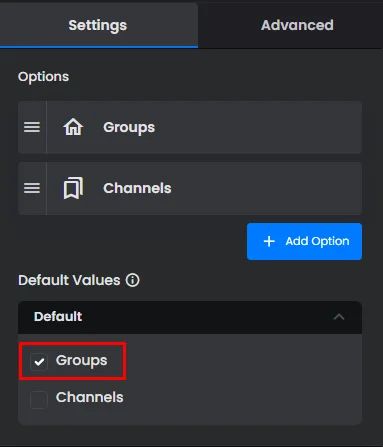
Now we want to test the ‘Groups’ option.
Go to the ‘Default Values’ and set the ‘Groups’ option as your default.
Click ‘Test Query.’
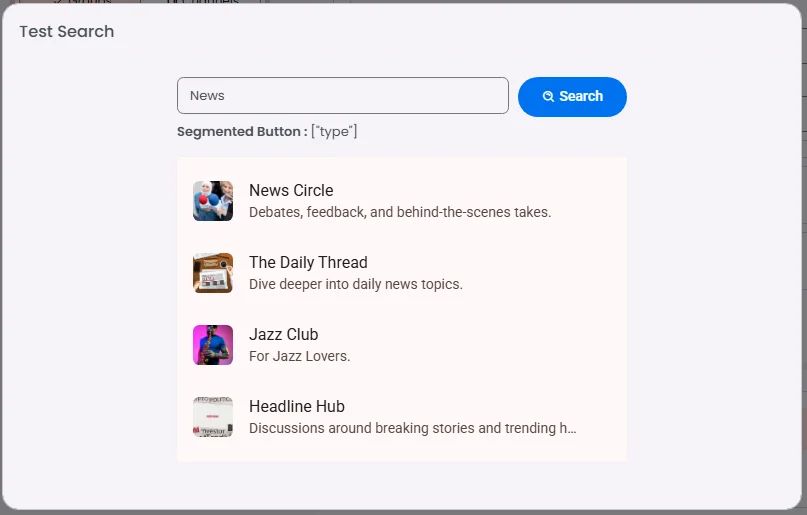
Enter the value ‘News,’ and the result will display groups that have either the name or description ‘News.’
And the same goes for channels: make the ‘Channel’ option your default, click ‘Test Query,’ and then’ Search.
Just like the search bar, you can apply both Additional Conditions and Optional Sorting to the query builders of these elements. These features work as enhancements, offering more control over how filtered results are refined and displayed.